
These wrappers provide a wholesome, flavorful base for your favorite dumpling fillings, capturing the authentic texture and aroma of traditional dumplings made from scratch. Click here to check out my Chicken Filling recipe!
Jump to RecipeThe Art of Dumpling Wrappers
Today, I’ll walk you through every step of making classic dumpling wrappers using freshly milled hard white wheat. We’ll explore all the little tips and tricks I’ve learned along the way. Whether you’re a dumpling novice or a seasoned home cook, this guide will help you create wrappers that are tender, flavorful, and uniquely your own.
Ingredients & Equipment
For the Dumpling Wrappers:
- 250g hard white wheat berries (to be milled on the finest setting)
- 156g hot water (not boiling)
- 1/2 teaspoon fine sea salt
- Extra freshly milled flour for dusting
Equipment:
- Grain mill (hand-crank or electric)
- Mixing bowl
- Chopsticks or sturdy spoon
- Kitchen scale (for accuracy)
- Rolling pin (a small, thin pin works best)
- Damp kitchen towel or plastic wrap
Why use freshly milled flour
Dumplings have been a beloved staple across Asia for centuries, with each region boasting its own signature style. In northern China, wheat based dumplings are a symbol of home and family, especially during holidays like Lunar New Year. Traditionally, families would gather to knead dough and roll wrappers together.
Modern convenience has led most of us to reach for pre-packaged flour, but there’s a world of difference when you mill your own. Freshly milled hard white wheat is aromatic, with a subtle sweetness and a creamy color. The bran and germ are present, lending a richer flavor and a boost of nutrition. Plus, the slightly coarser texture gives the dough a rustic, satisfying chew.
Ingredients & Equipment
For the Dumpling Wrappers:
- 250g hard white wheat berries (milled on the finest setting)
- 156g hot water (not quite boiling)
- 1/2 teaspoon fine sea salt
- Extra freshly milled flour for dusting
Equipment:
- Grain mill (hand-crank or electric)
- Mixing bowl
- Chopsticks or sturdy spoon
- Kitchen scale (for accuracy)
- Rolling pin (a small, thin pin works best)
- Damp kitchen towel or plastic wrap
Step 1: Milling Your Wheat
Start by measuring out 250g of hard white wheat berries. Set your mill to the finest setting and pour in your grain. (always refer to your manual as different mills differ in the process.)
Why hard white wheat?
Hard white wheat has a high protein content, which gives your dough the strength it needs for rolling and pleating. Its flavor is milder and slightly sweeter than red wheat, making it perfect for delicate dumpling wrappers. Khorasan and Spelt can also be used, just ensure you adjust the water based off of the Water Absorbency Capacity.
Step 2: Mixing the Dough
- Combine the Ingredients:
In a large mixing bowl, combine the freshly milled flour and salt. Pour in the hot water in a steady stream. The hot water helps gelatinize some of the starches, resulting in a dough that’s more supple and easier to roll thin. - Mix Until Moistened:
Use chopsticks, a fork, or your hands to stir the mixture. At first, it will look dry and crumbly but don’t worry! This is typical for dumpling dough, especially with freshly milled flour. You can also use a stand mixer, just be careful to watch the mixer for signs of struggle as this is a very dense dough. - Autolyse (Rest the Dough):
Cover the bowl with a damp towel and let the mixture rest for 15–30 minutes. This “autolyse” step allows the flour to fully hydrate and the gluten to start forming, making kneading much easier and more effective.
Why Autolyse:
The autolyse technique, borrowed from artisan bread baking, is a game changer for freshly milled dough. It’s a simple pause that makes a world of difference in texture. The autolyse step is extremely important when baking with freshly milled flour. It prevents the harder parts of the whole grain from cutting the gluten as you knead.
Step 3: Kneading
After the dough has rested, turn it out onto a clean, lightly floured surface. Begin kneading by pressing the dough away from you with the heel of your hand, then folding it back over itself. Rotate and repeat.
What to Expect:
The dough will be stiff and a bit dry at first, but as you knead, it will gradually become smoother and more elastic. This can take 8–10 minutes by hand. If the dough is too dry to come together, wet your hands slightly or mist the dough with water and continue kneading. Avoid adding extra water directly, as it can make the dough too wet and sticky.
How to Know It’s Ready:
The dough should be smooth, firm, and slightly tacky but not sticky. When you press a finger into it, the dough should slowly spring back.
Rest Again:
Shape the dough into a ball, cover it with a damp towel or plastic wrap, and let it rest for at least 45 minutes (up to 2 hours is fine). This rest relaxes the gluten, making the dough much easier to roll out and shape.
Step 4: Portioning the Dough
After the dough has rested, it’s time to divide it into small, even pieces. Use a kitchen scale for accuracy. Each piece should weigh between 9–11g. This will yield wrappers that are the perfect size for most classic dumplings.
How to Portion:
- Roll the dough into a log about 1 inch (2.5 cm) thick.
- Cut the log into even pieces, weighing each one. Each should weigh between 9-11 grams
- Roll each piece into a ball, keeping the balls covered with a damp towel or plastic wrap to prevent drying.
History:
In many Chinese households, this step is a communal activity. Children and elders alike gather around the table, rolling dough balls and sharing stories. It’s a beautiful way to connect across generations.
I absolutely understand making this a family affair now! Making enough dumplings to feed a family is no small task. While the process and recipe is very straight forward they are time consuming and takes a lot of practice to get efficient. My sister and I have so much fun getting together to make these, but it is a labor of love. You certainly will know if I like you if you get dumplings at my house!
Step 5: Rolling Out the Wrappers
Rolling out dumpling wrappers is an art in itself. The goal is to create a disc about 3–4 inches (8–10 cm) in diameter, with edges thinner than the center. This ensures the dumpling cooks evenly and the pleated edges aren’t too thick.
Rolling Technique:
- Dust your work surface and rolling pin with flour.
- Roll one of the portioned balls in flour, coating it well. Flatten the dough ball with your palm to form a small disc.
- Hold the disc with one hand and, with the other, roll the pin over just the edge of the dough, rotating the disc as you go. This creates a wrapper that’s slightly thicker in the center and thin at the edges.
- Repeat until the wrapper is about 3–4 inches wide.
Tips:
- Work in small batches (5–10 wrappers at a time), keeping the rest covered.
- If the dough resists rolling, let it rest a few minutes longer.
- Don’t worry if your wrappers aren’t perfectly round, pleating will hide minor imperfections.
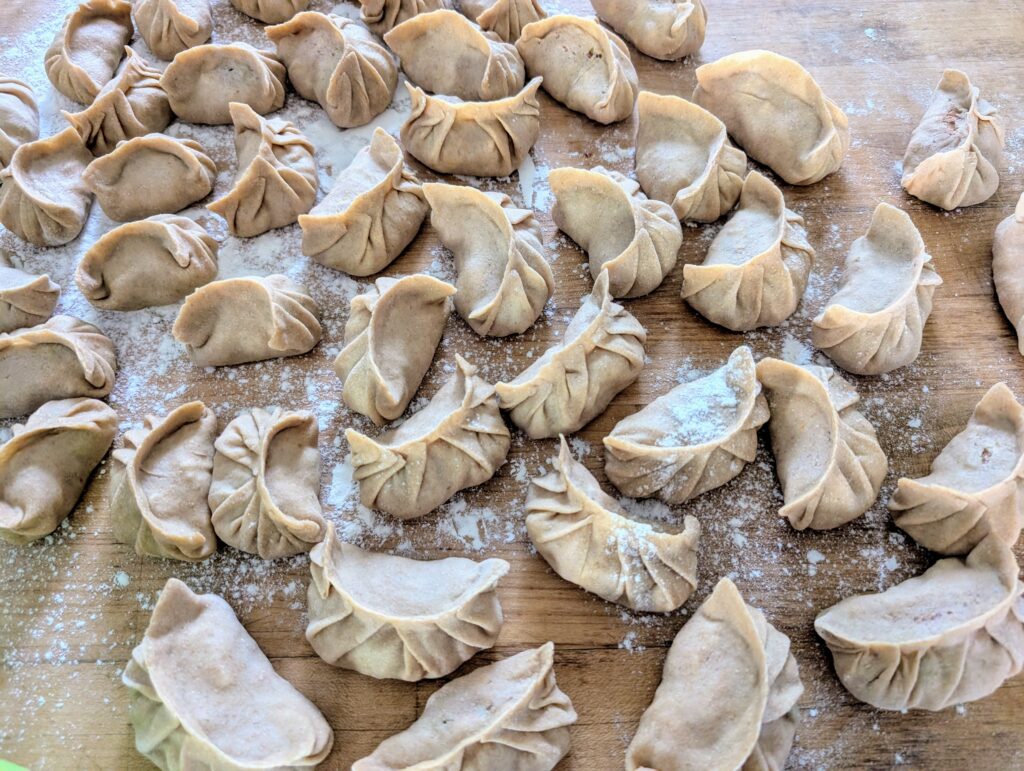
Step 6: Filling, Folding, and Pleating
Now comes the fun part; filling and folding your dumplings!
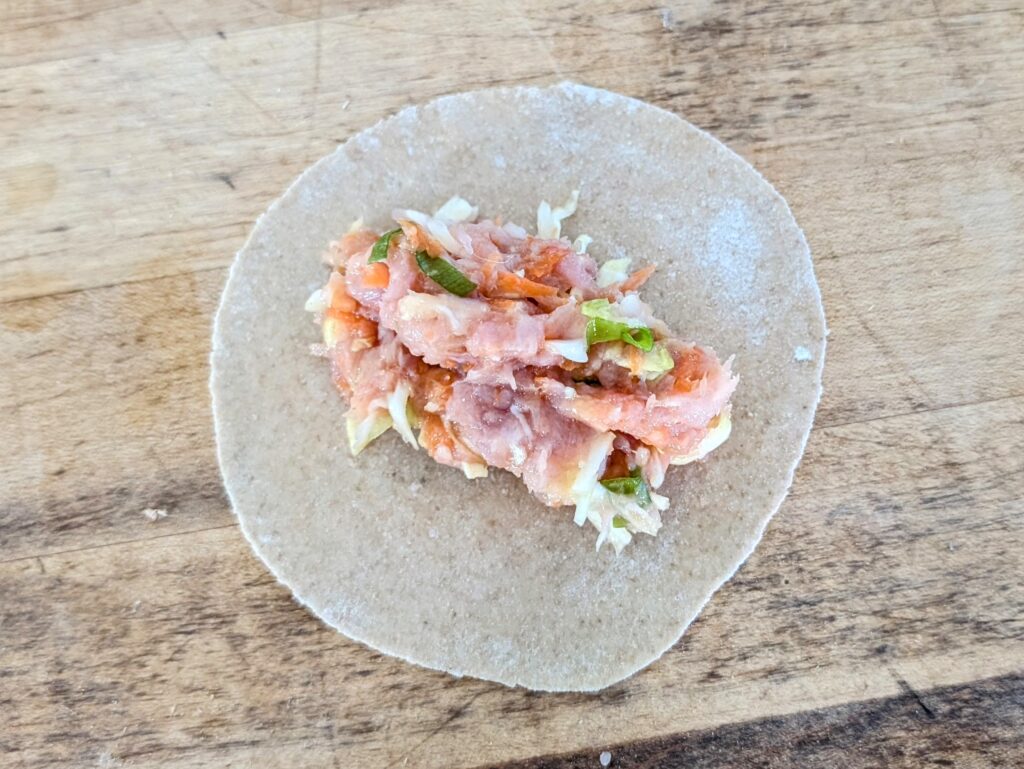
Filling
Spoon about 1 tablespoon of your chosen filling into the center of each wrapper. Classic pork and cabbage, shrimp and chive, or vegetarian mixes all work beautifully. Check out my Chicken Potstickers Filling! ! Don’t overfill, or the dumplings will be hard to seal.
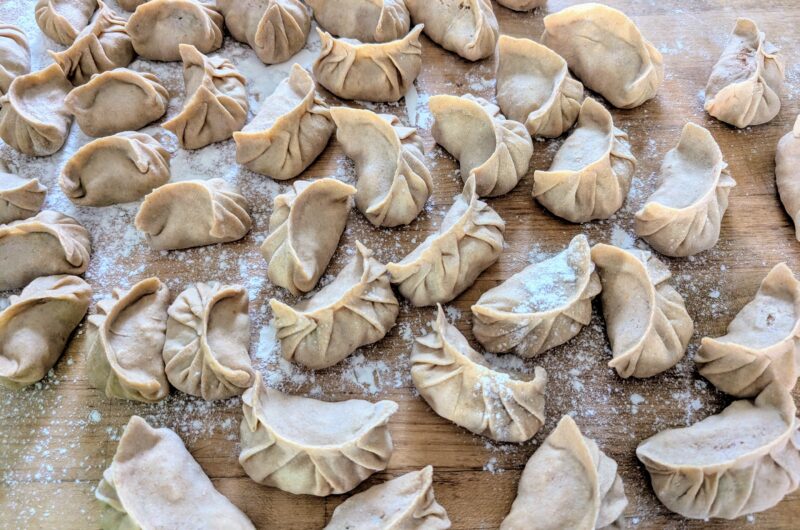
Sealing and Pleating
Classic Pleating:
- Moisten the edge of the wrapper with a little water.
- Fold both sides of the wrapper up over the filling.
- Pinch only the center together leaving the left and right sides open.
- The side closest to you will remain smooth while the far side will be pleated. This will create the classic crescent shape. Do this by using one hand to hold the center where we pinched the wrapper together.
- With the other hard, push about half and inch down on the side furthest away, toward the center. This will create a pleat or fold. Pinch this pleat together.
- Continue along the edge until you reach the end.
- Repeat on the other side.
Tips:
- I use a fine mist spray bottle to mist the dough after placing the filling in the center. This will moisten the edges quickly without having to stop and apply water using a finger or brush.
- Keep your fingers and the dough lightly floured to prevent sticking.
- If the dough dries out, cover it with a damp towel and work quickly.
- Practice makes perfect! Your first few dumplings might look rustic, but they’ll taste just as good.
Cooking and Storing
To Cook:
- Boil: Drop dumplings into boiling water and cook until they float plus 1–2 minutes.
- Steam: Arrange on parchment in a steamer and steam for 8–10 minutes.
- Pan-fry (Pot Stickers): Place them in a hot, lightly oiled pan. Add a splash of water, cover, and steam until cooked through. Remove the cover and cook until the bottoms are crisp.
To Store:
- Freeze uncooked dumplings on a tray, then transfer to a bag. Cook from frozen, adding a minute or two to the cooking time.
Troubleshooting & Tips
- Dough too stiff? Let it rest longer or knead with slightly wet hands.
- Wrappers sticking? Use more flour for dusting.
- Dough tearing? Roll a bit thicker, or let the dough rest longer.
- Wrappers drying out? Always keep unused dough and wrappers covered.
Happy dumpling making! If you try this recipe, I’d love to hear your stories and see your creations. Tag me or leave a comment below!
Dumpling Wrappers with Freshly Milled Flour
Course: Appetizers, DinnersCuisine: AsianDifficulty: Easy40
wrappers3
hours10
minutes21
kcal3
hours10
minutesThese wrappers provide a wholesome, flavorful base for your favorite dumpling fillings, capturing the authentic texture and aroma of traditional dumplings made from scratch.
Ingredients
250g hard white wheat
156g hot water
1/2 tsp salt.
Directions
- Mill the wheat on the finest setting. Combine with the hot water and salt.
- Mix until the flour is all moistened. (Dough will be very dry and stiff)
- Autolyse for 15-30 minutes.
- Knead until smooth and elastic. The dough should not be sticky. If it is too dry, wet your hands and continue kneading or mist the dough lightly with water.
- Rest for 45 minutes or longer.
- Separate into 9-11g balls. Dust ball well with extra flour.
- Roll out into a 3-4 inch disc. Fill with your desired filling, fold and pleat
Notes
- Dough too stiff? Let it rest longer or knead with slightly wet hands.
Wrappers sticking? Use more flour for dusting.
Dough tearing? Roll a bit thicker, or let the dough rest longer.
Wrappers drying out? Always keep unused dough and wrappers covered.
**Nutriotion facts are an estimate and should not be used to make medical decisions.
Nutrition Facts
40 servings per container
Serving Size10
- Amount Per ServingCalories21
- % Daily Value *
- Total Fat
0.1g
1%
- Sodium 15mg 1%
- Total Carbohydrate
4.3g
2%
- Dietary Fiber 0.7g 3%
- Protein 0.8g 2%
* The % Daily Value tells you how much a nutrient in a serving of food contributes to a daily diet. 2,000 calories a day is used for general nutrition advice.