
After a trip to Jersey, I fell in love with the crispy and light New Jersey style pizza crust! I finally figured out how to recreate it at home with Freshly Milled Flour. This took a lot of trial and error and I’m so excited to share it with you!
Jump to RecipeDeveloping this recipe took MANY MANY tries. I could not get that light crust that was oh so airy and feather light while holding its structure. I finally realized it was my flour blend! A higher protein content was needed in order to achieve the texture I was looking for. I have made great pizza crusts with just hard white wheat but I would strongly suggest getting Durum wheat. The flavor and texture it brings is incredible!
New Jersey Style Pizza Timeline
This timeline is set up for a Friday Night Pizza Night! This is a three day process so you can easily adjust the day it is ready. Simply begin the process three days before you would like New Jersey Style pizza.
Tuesday 5:00 PM

Autolyse
Combine the water, sugar or honey and flour. Autolyse for 14-30 minutes
Tuesday 5:30PM
Knead
Add the salt, oil and yeast and knead until you reach a windowpane.
Tuesday 6:00
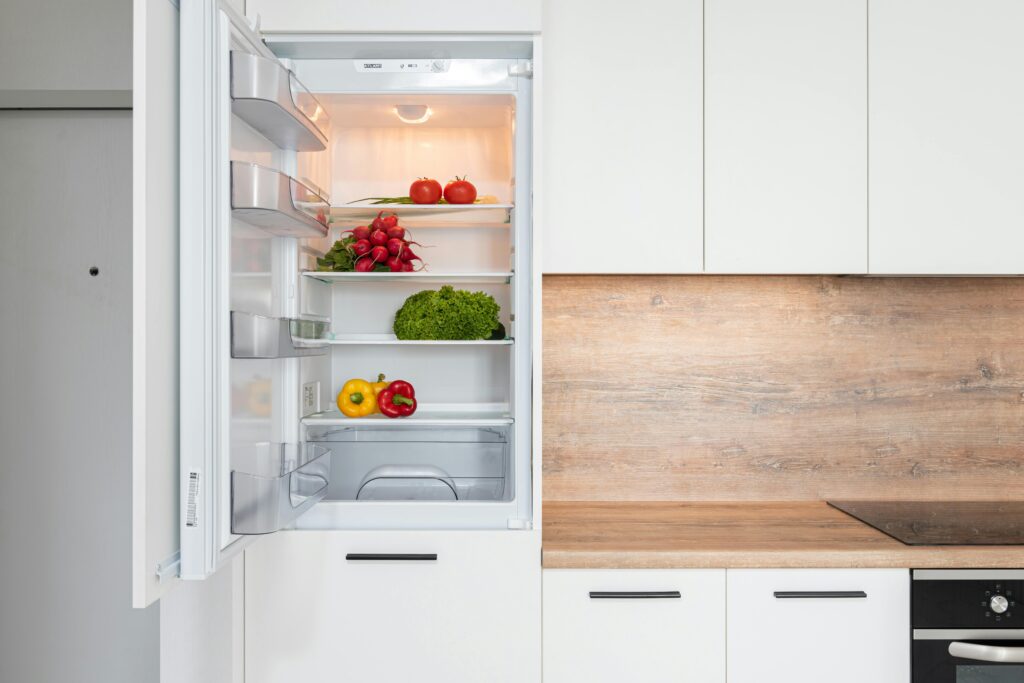
Cold Fermentation
Place the dough in the fridge for 72 hours for the best flavor and texture.
Friday 1:00 PM
Final Rise and Shaping
Rest the dough for three hours at room temperature.
Shape the dough into two rounds. Preheat the oven and baking steel to 500 degrees while you top the pizza.
Friday 4:30 PM
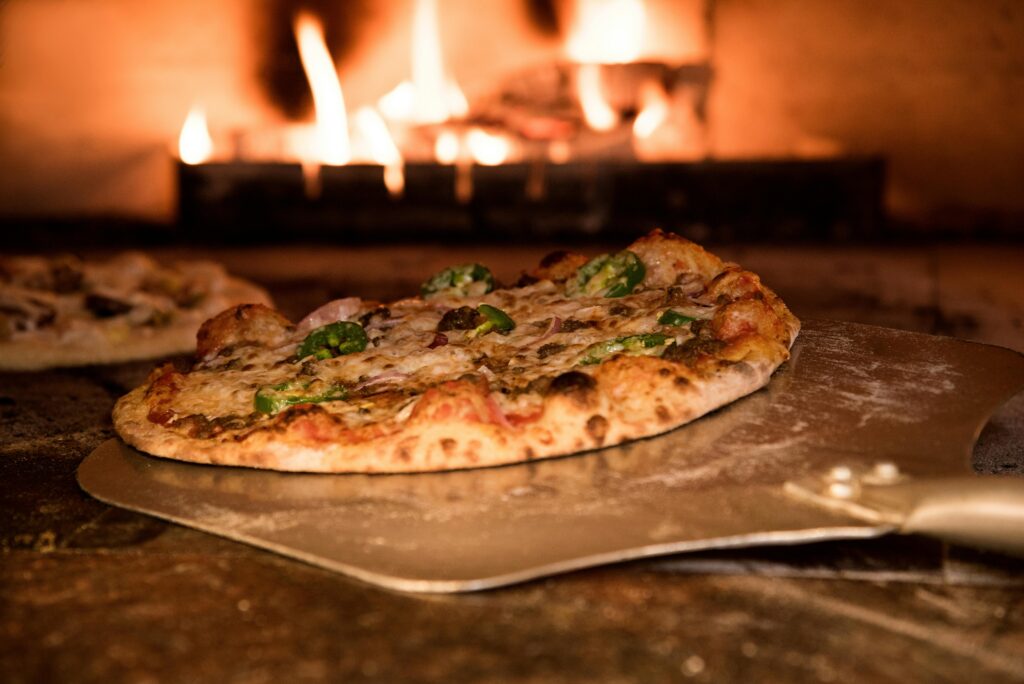
Baking New Jersey Style Pizza
Bake the pizza for 10 minutes or until crispy and golden.
Step by Step
Follow along for instruction on how to make New Jersey Style Pizza Crust with Freshly Milled Flour.
Milling the Flour for New Jersey Style Pizza Crust
Begin by weighing out both the Durum and Hard White wheat berries. Precision is key here, which is why all my recipes use grams rather than cups. Measuring by weight ensures consistency every time you bake. Using cups can introduce a lot of variation. Just a few wheat berries can easily add up to a teaspoon or more of flour. This can throw off your dough quite a bit. Once you have your grains measured, set your grain mill to the finest setting for the best texture. Then pour in your prepared wheat and start milling.
For the classic New Jersey style pizza crust protein is key. This blend of Durum and Hard White flour is essential to achieving the texture and flavor.
Autolyse
Autolyse is simply mixing your flour with the wet ingredients and allowing it to rest for about 30 minutes. This to allow the flour to absorb the water and soften the bran and germ. DO NOT skip this step! The bran and germ are hard and will cut the gluten while you knead. We do not want anything preventing you from getting a properly developed gluten structure.
Combine the water and sugar or honey in the bowl of your stand mixer. Wisk until combined and pour into the dry ingredients. Mix until a shaggy dough forms, cover and allow to rest for 30 minutes.
DO NOT add the oil in with the wet ingredients. The oil will coat the flour and prevent it from properly absorbing the water.
I will also weigh out and set on top of the covered dough, the oil, yeast and salt. I can not tell you have many times I have been halfway through kneading and realized I forgot the yeast.
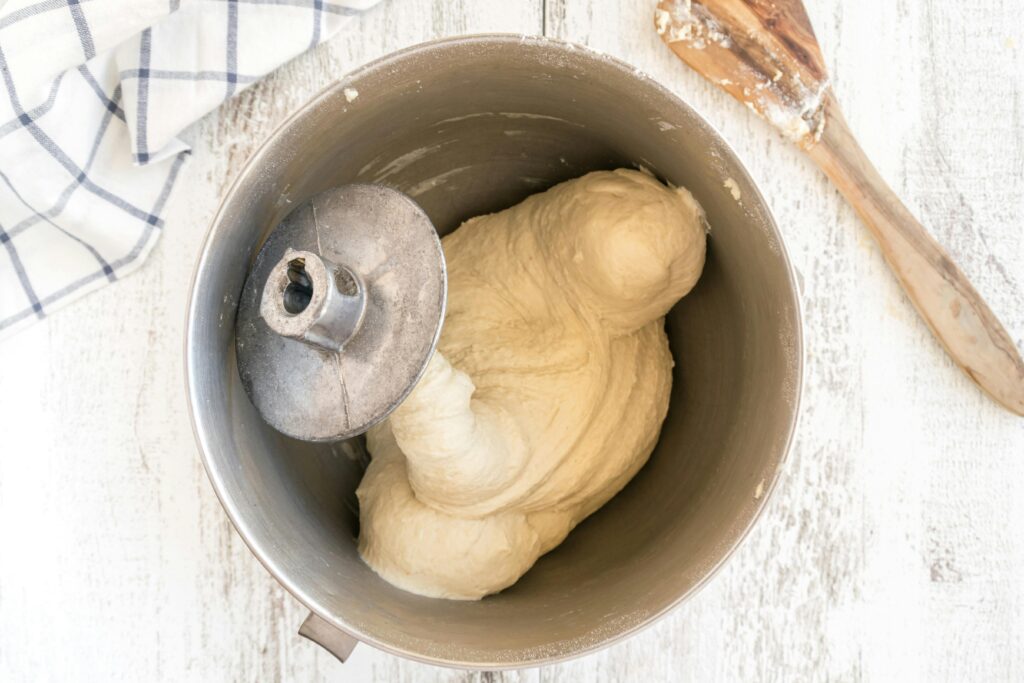
Kneading
This is the step I tend to see people have the most issue with freshly milled flour. Allowing the dough to autolyse is essential to a successful kneading step. But there are also a few tips I have found to achieving the perfect windowpane. Freshly Milled Flour loves a high hydration recipe. This can be difficult to work with if you do not have experience with high hydration or sourdough techniques. I find, even with a yeast recipe, I will need to do slap and folds. This is typically seen as a sourdough technique but is useful here too.
Begin the kneading process by adding your oil, yeast and salt. I add the oil at this point. If you add it before the autolyse step it will coat the flour, preventing it from properly absorbing the water. Now you will knead until a window pane is achieved. If you are familiar with yeast breads, kneading is a familiar step. In yeast doughs a window pane, while achievable, is not required for a good final product. Fresh milled flour is a bit more sensitive to being properly kneaded. I have a kitchen aid but unfortunately not all come with the correct hook. While a beast with pastries, it does not do as well with the C-shaped dough hook. A spiral hook is an essential tool unless you enjoy babysitting the dough. C-shaped hooks are notorious for dough climbing or not kneading at all.
Dough Hooks
Kitchen Aid has a C-shape and a spiral dough hook. A common problems people have dough climbing the hook. If you are doing a small batch it may miss the dough altogether. You may want to look into getting a spiral hook if you make a lot of breads. It will save you a lot of headaches! If you do not have a stand mixer or only have a C-Hook you can absolutely knead by hand.
This dough is actually very easy to knead by hand. I have tailored the hydration to not be so high as to be super sticky while still sufficiently hydrating the flour. I do not add flour on my board or hands when kneading. This will just add too much flour to your dough and change the hydration levels. Instead, use a combination of traditional kneading and slap and folds. If you have a Bosch or Ankarsrum mixer they do a phenomenal job. But you can absolutely achieve the same results in a kitchen aid or by hand.
Fermentation
Same Day: For a same day bake, allow the dough to rise for one hour or until doubled in size
For Better Flavor: Refrigerate 48-72 hours. If you are aiming for 48 hours, allow it to rise at room temperature for 30 minutes before refrigerating. For 72 hours just pop it straight into the fridge
*please note! If you are doing more than a double batch, the dough will retain its heat for much longer in the fridge leading to over proofing. You will need to separate the dough to prevent this.*
Cold fermentation is essential for New Jersey style pizza crust because it dramatically enhances both the flavor and texture of the dough. By allowing the dough to rise slowly in the refrigerator, typically for 48 to 72 hours, yeast activity is slowed, which gives the gluten structure more time to develop. This results in a crust that is lighter and airier, with a perfectly crispy exterior and a soft, chewy interior
Why do a cold fermentation
Flavor-wise, the extended fermentation allows yeast to break down more sugars in the flour, producing a subtle, complex taste with balanced sweetness and tanginess, far beyond what you get from a quick-rise dough. The slow process also helps the dough retain its natural sugars, leading to better browning and a richer, more nuanced flavor profile key to new jersey style pizza crust.
Additionally, cold fermentation increases the dough’s shelf life, makes it easier to handle, and provides greater consistency in the final product, even for home bakers. This technique is widely recognized as the key to achieving the signature chew, flavor, and crispness that define great New Jersey style pizza crusts. The wait is well worth it, I promise! I like to make a large batch and freeze the dough after the cold fermentation so I can have pizza without the long wait. I place the balls on a silicone mat and freeze solid before bagging them. This way I can just grab one from the freezer and thaw in the fridge overnight or on the counter for a few hours whenever we feel like pizza!
Day of Baking
Remove the dough from the fridge four hours before you would like to eat. Allow it to come to room temperature and finish rising for three hours.
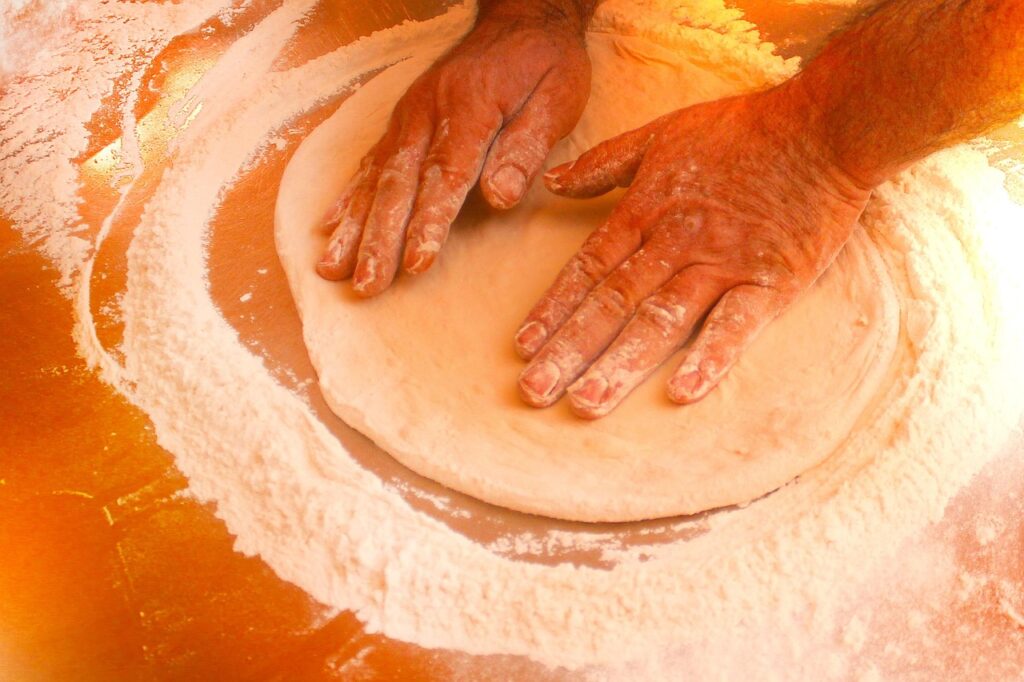
Turn the dough out onto a lightly floured surface and divide it into two balls. This is the point I will freeze the dough if you made a large batch for the freezer.
Gently stretch the dough into a large circle, roughly 12-15 inches. Adjust the thickness to your liking! I also like to divide the dough into four instead of two balls. We make mini pizzas for the kids to top however they would like! Allow the dough to rest for another 15 minutes covered with plastic wrap or a damp cloth. While it rests, Preheat your oven.
Place a baking steel or Pizza stone into your oven and preheat to 500 degrees. I realize the average person may not have a baking steel but it does give the crust that crisp that NJ style crust is known for. You can use a baking stone or a large heavy baking sheet turned upside-down on the oven rack. Alternatively you can just assemble the pizza onto a round baking sheet dusted with corn meal. You will still have delicious results so use what you have!
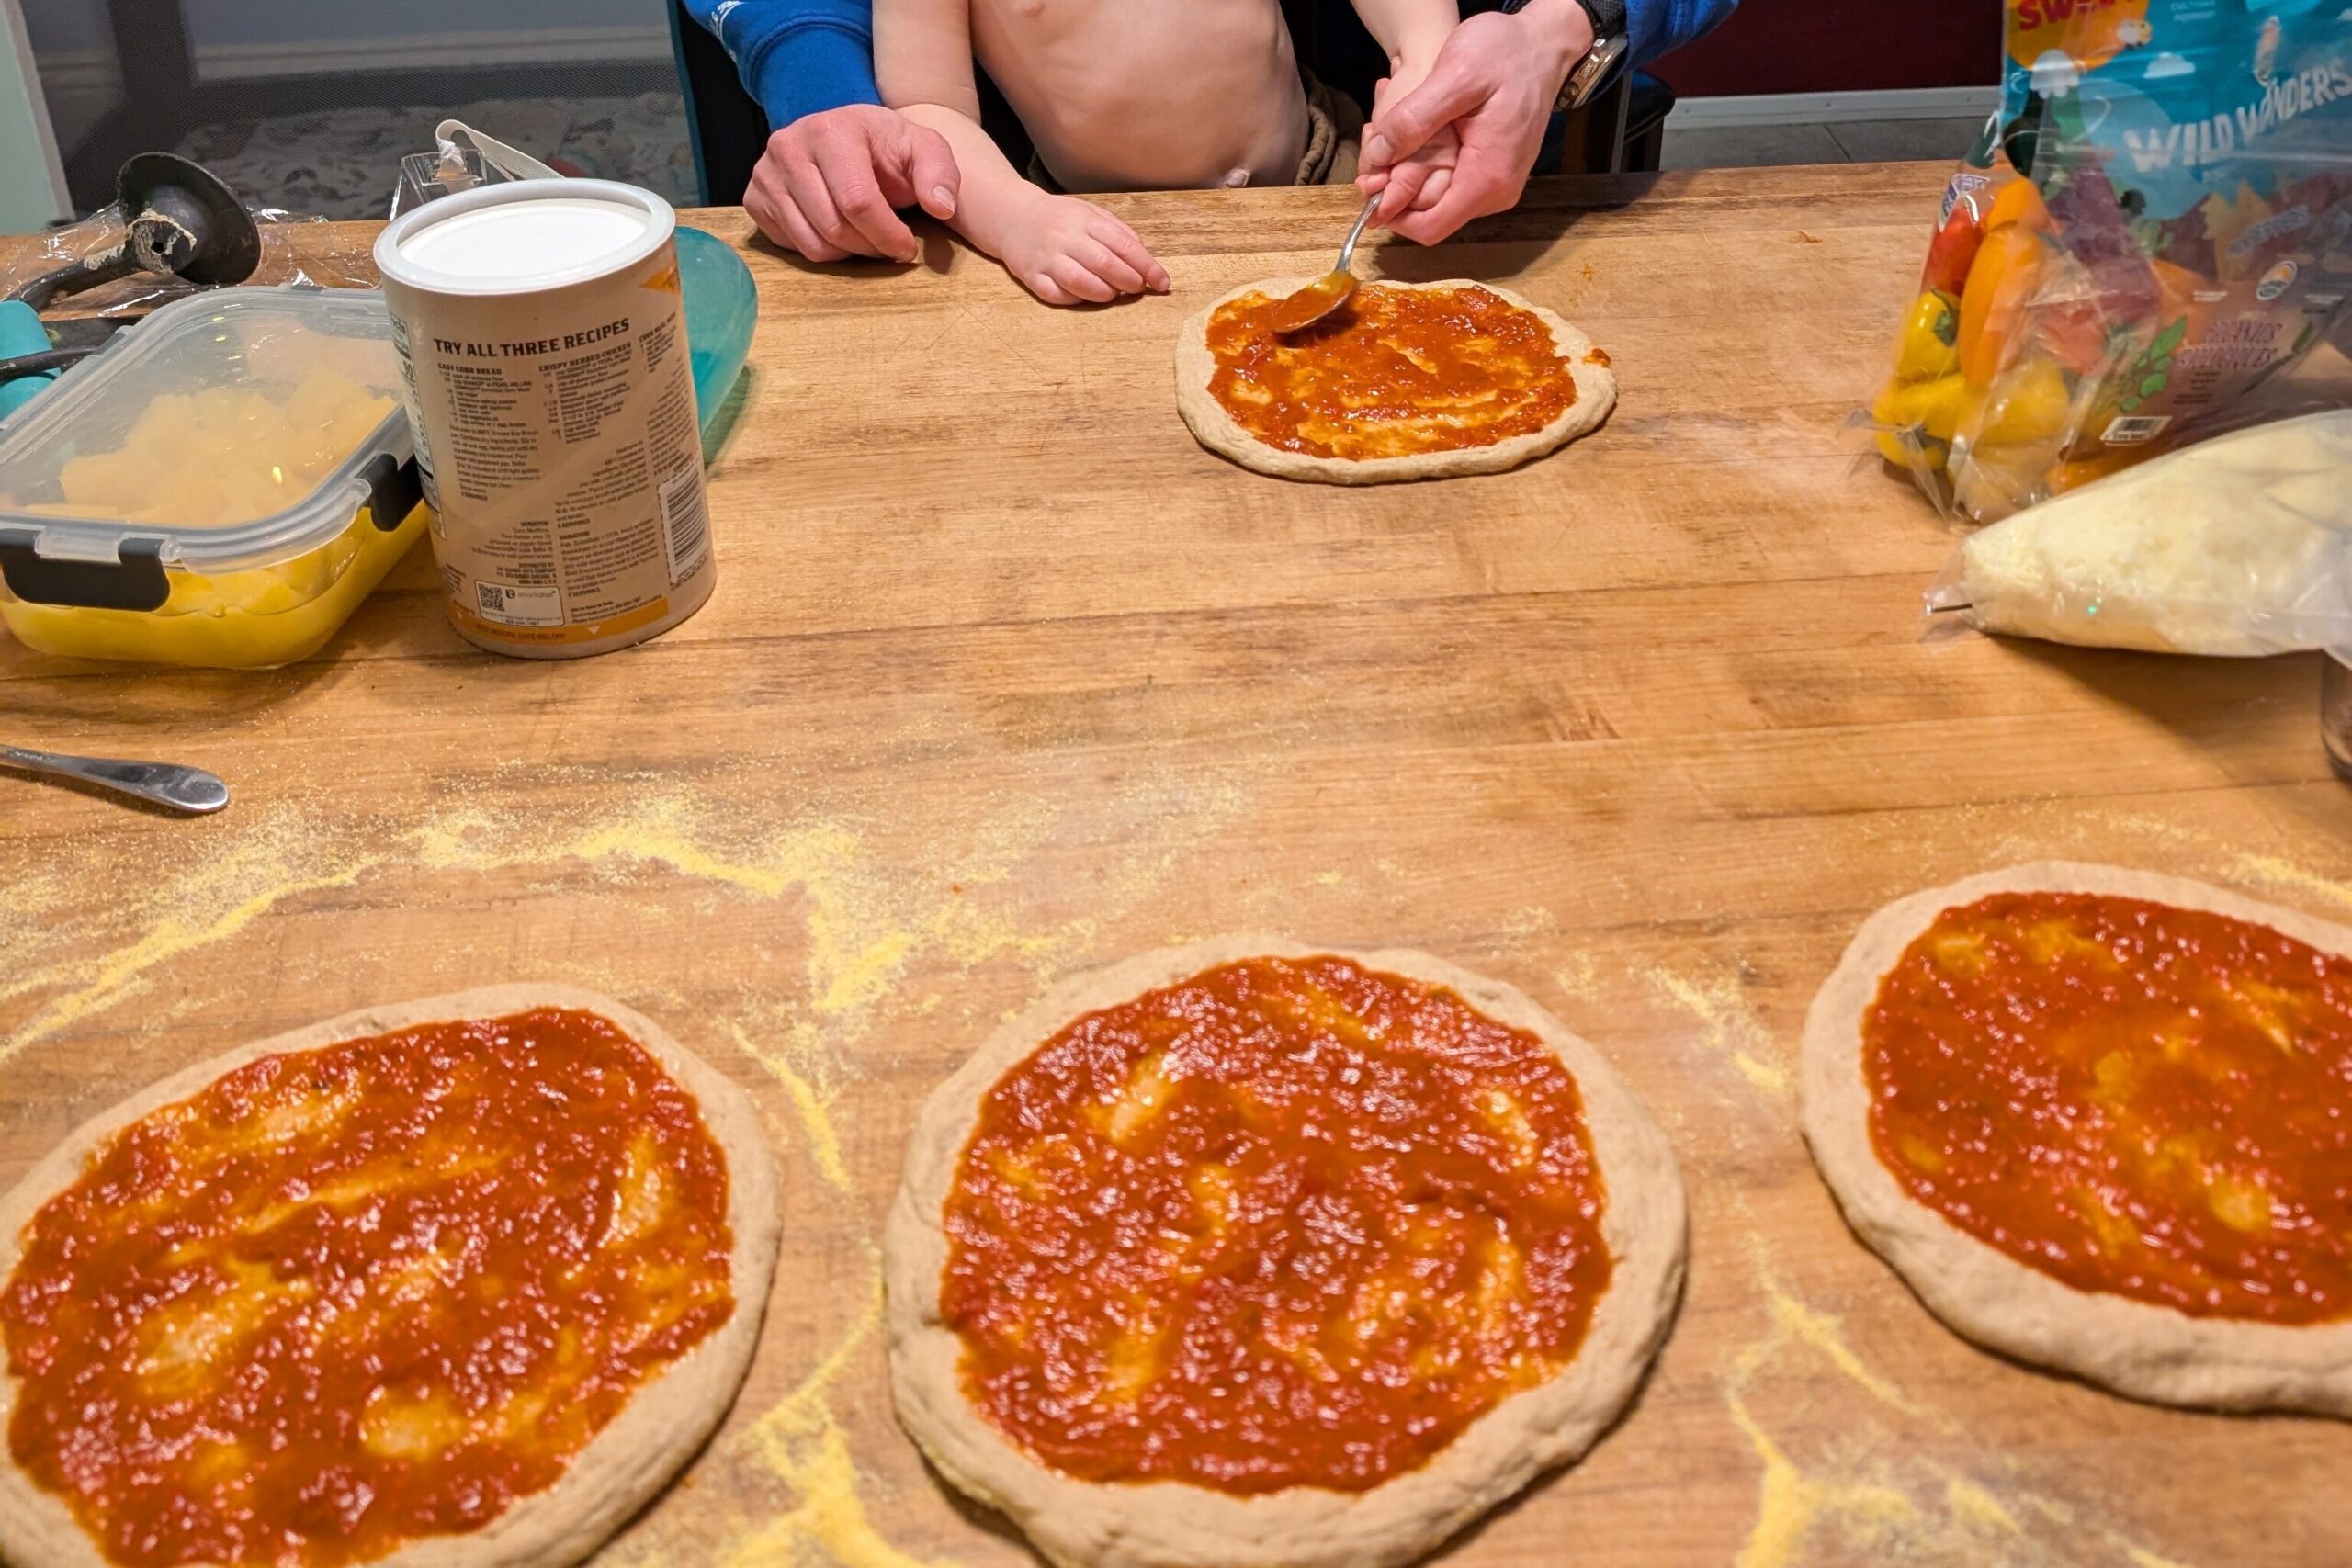
Top the Pizza
Top your dough rounds with whatever your favorite toppings are. We love bacon and pineapple (I know *gasp* controversial!) or ground beef, peppers and onions. Please keep in mind, the thinner your crust, the lighter your toppings should be. Otherwise it will be a PAIN to transfer onto your pizza peel. When baking large pizzas, I only bake one at a time. I will dust my pizza peel with corn meal and build the pizza directly on the peel. This way I only need to slide it into the oven. Keep the other dough rounds covered while you build and bake so they don’t dry out.
*here we are making mini pizzas as a family
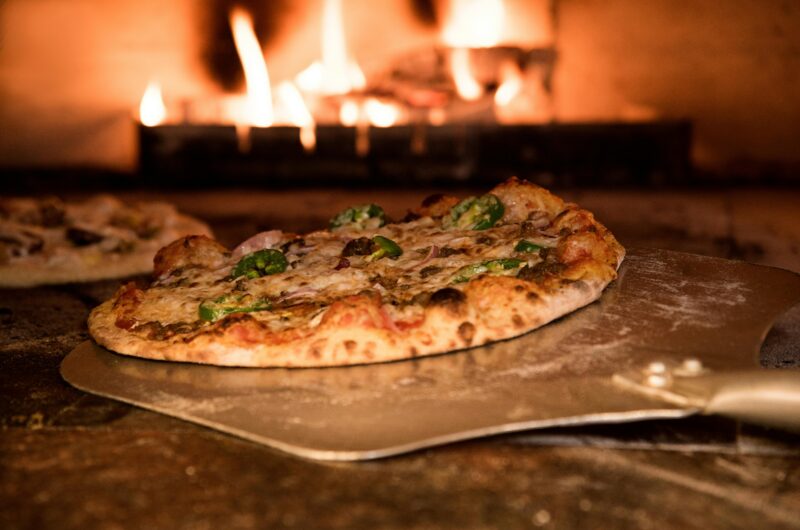
Baking New Jersey Style Pizza
Once you have built your pizza, slide it onto your pizza peel. (unless you built it directly on top of it). If it sticks you need to use more corn meal! Slide the pizza onto your baking steel or stone. Spritz the inside of your oven with some water to increase the hydration in your oven. Bake for 10 minutes while you build your next pizza.
Whether you are using a pizza peel or a thin board, the transfer into the hot oven seems to trip people up a bit. Give the pizza peel or board a shake until the pizza is sliding around freely. This is why enough corn meal is essential! When it is sliding around freely, hold it over the hot baking steel or stone. With a quick motion flick the pizza forward and yank the peel away. (think table cloth magic trick quick!)
Once the pizza is nicely crisped, slide it out of the oven onto your pizza peel. Allow it to cool on a wire rack if you are not eating it right away. If it sits on a flat surface like your table or counter it will lose the crispy, crackly bottom. While it will still be delicious, it will not have that new jersey style pizza, crisp and chewy texture we are after. Enjoy!
New Jersey Style Pizza Crust
Course: DinnerCuisine: American, Italian2
crusts30
minutes10
minutes72
hoursIngredients
322g Durum
138g Hard White Wheat
354g Water (warm, around 90°F)
1 Tbsp Sugar or Honey
2 Tbsp Olive Oil
1.5 tsp Salt
2 tsp Instant Yeast
Directions
- Combine the warm water and sugar in the bowl of your stand mixer
- Gradually add the fresh milled flour blend (322 g Durum + 138 g Hard White) and mix until fully incorporated.
- Cover the dough and let it rest for at least 15-30 minutes to allow the flour to absorb the water.
- Add salt, oil and yeast to the dough and knead until it passes the “windowpane test” (about 20–25 minutes for fresh milled flour).
- Fermentation Options:
For same-day use: Let the dough rise for 1 hour or until doubled in size.
For better flavor: Refrigerate overnight (up to 3 days) for cold fermentation. - Remove the dough four hours before you would like to eat and punch down. Divide into 2 equal portions for two 12–14 inch pizzas or three smaller pizzas. Let it rest at room temperature for three hours. If your house is over 70 degrees reduce this rest time to two hours to prevent over proofing.
- Set your oven to 500°F with your baking steel, pizza stone or baking sheet upside-down to pre-heat
- Flatten each portion on a pizza peel dusted heavily with cornmeal
- Add sauce and toppings, then bake for about 8-10 minutes on the preheated baking steel.
Notes
- Baking steel. I realize the average person may not have a baking steel but it does give the crust that crisp that NJ style crust is known for. You can use a baking stone or a large heavy baking sheet turned upside-down on the oven rack. Alternatively you can just assemble the pizza onto a round baking sheet dusted with corn meal. You will still have delicious results so use what you have!
- Pizza peal. Another item not every household will have… I know I did not when I started out. you can use a large, THIN cutting board or edgeless baking sheet but it is essential that you dust it with cornmeal and BUILD THE PIZZA DIRECTLY ON THE BOARD. I emphasize this because the edges will make it a nearly impossible task to slide the pizza onto it.
- If you are doubling the recipe, or more, separate the dough into individual rounds before refrigerating. Having too much bulk in one container will trap in the heat and cause it to overproof.
Nutrition Facts
16 servings per container
- Amount Per ServingCalories100
- % Daily Value *
- Total Fat
1.7g
3%
- Sodium 225mg 10%
- Total Carbohydrate
20g
8%
- Dietary Fiber 1g 4%
- Total Sugars 0.5g
- Protein 2.5g 5%
* The % Daily Value tells you how much a nutrient in a serving of food contributes to a daily diet. 2,000 calories a day is used for general nutrition advice.
Did you ever post the build directions for your pizza oven that you all built? I’d be interested in seeing those. Your pizza looks delicious!
I have not unfortunately 😞. I had some family emergencies come up and had to take a break for a while. If you are interested, HAXMAN and Chefsteps on YouTube have some great videos on building these ovens though!