
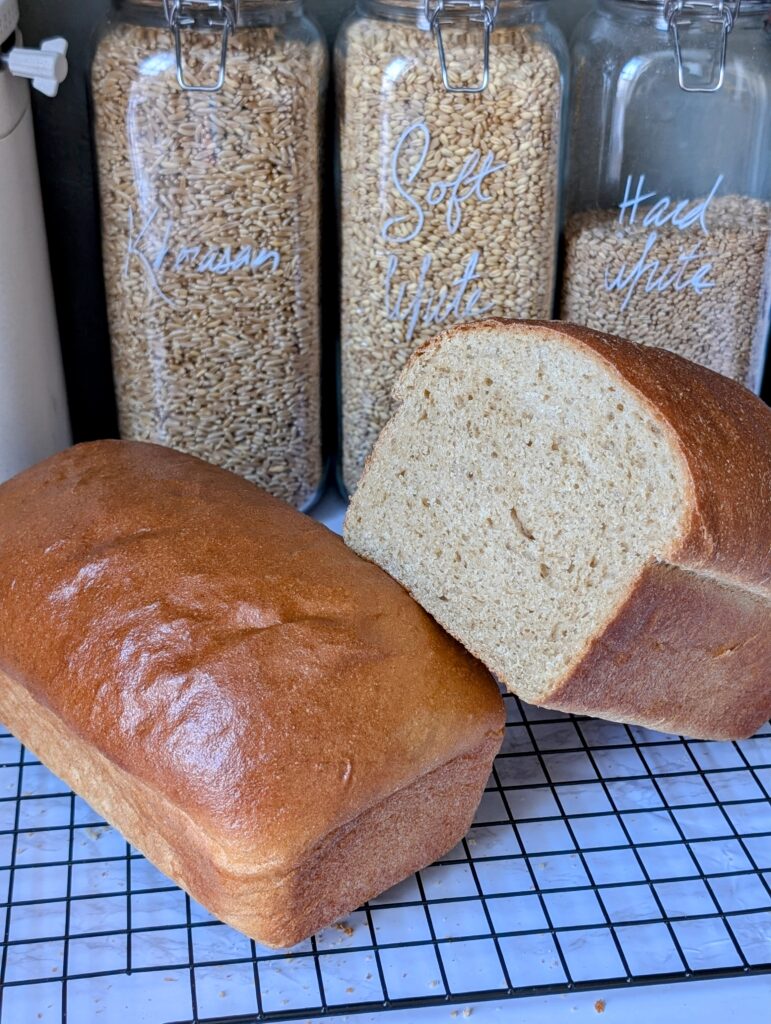
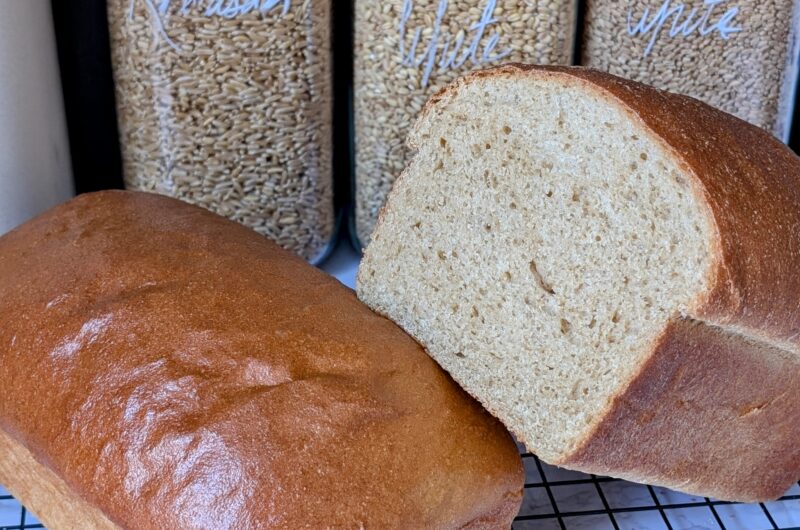
There’s something truly magical about baking bread from scratch, especially when you start with freshly milled whole grains. After much trial and error, I’m so excited to share my recipe with you! This recipe combines the wholesome nutrition and rustic charm of whole grains with a tender crumb and beautiful rise, perfect for everything from classic sandwiches to buttery toast.
Jump to RecipeWhether you’re a seasoned bread baker or a curious beginner, this recipe will walk you through every step, providing tips and insights to help you create a loaf that’s both delicious and deeply satisfying. I have found too many bread recipes using freshly milled flour to be crumbly and fall apart. In this recipe I use a few different ingredients that really change the overall texture and shelf life of the loaf. Read below for more information!
Why Freshly Milled Grains Matter
Using freshly milled flour transforms your bread in ways that pre-milled flours simply can’t match. Milling your own wheat berries preserves the natural oils, nutrients, and flavor compounds that degrade over time in store-bought flour. The result is bread with a richer, nuttier flavor and a more complex aroma.
Hard white wheat is prized for its mild, slightly sweet flavor and light color, making it ideal for soft sandwich loaves. Khorasan, an ancient grain related to durum wheat, adds a subtle buttery note and golden hue, along with a rich nutritional profile including protein, minerals, and antioxidants.
If you do not want to use vital wheat gluten in this recipe you can replace the Khorasan with Durum. Durum will increase the gluten formation ability.
Together, these grains create a loaf that’s not only wholesome but also tender and beautifully textured.
Ingredient Breakdown & Their Roles
Every ingredient in this recipe has been carefully chosen to provide you with a soft, durable loaf that can hold up to sandwiches! No one want crumbly bread for lunch!
- 400g hard white wheat (finely milled): The base flour, provides structure and mild flavor.
- 40g kamut (finely milled): Adds richness, color, and a nutty undertone.
- 15g vital wheat gluten (optional): Helps improve dough elasticity and rise, especially important when using whole grains which can weaken gluten networks.
- 264g warm water: Hydrates the flour, activates yeast.
- 32g honey (or 12g sugar): Adds sweetness and helps with browning.
- 1 egg: Enriches the dough, improves crumb softness and color.
- 5g white vinegar: Strengthens gluten and improves shelf life.
- 60g soft butter: Adds tenderness and richness.
- 8g instant yeast: Leavens the dough.
- 9g salt: Enhances flavor and controls yeast activity.
Step-by-Step Guide to Perfect Sandwich Bread
Milling Your Grains
Start by milling your hard white wheat and kamut berries on the finest setting your grain mill allows. The fine grind helps the dough develop good gluten structure while retaining the whole grain’s nutrition and flavor. Mix in the vital wheat gluten with the flour to boost elasticity and improve rise.
Preparing the Wet Ingredients
In a separate bowl, whisk together the warm water, honey (or sugar), egg, and white vinegar. The vinegar might seem unusual, but it’s a baker’s secret weapon: it strengthens gluten bonds, improves dough extensibility, and extends freshness.
Mixing and Autolyse
Pour the wet ingredients into the flour mixture and stir until all the flour is moistened and a wet dough forms. Cover and let the dough rest for 30 minutes. This rest period, called autolyse, allows the flour to fully absorb the water, softens the bran, and jumpstarts gluten formation-especially important for freshly milled whole grain flours.
Adding Butter, Yeast, and Salt
After autolyse, add the softened butter, yeast, and salt to the dough. Mix thoroughly to incorporate. The butter enriches the dough, making it softer and more tender, while the yeast and salt balance fermentation and flavor.
Kneading to Windowpane
Knead the dough until it’s smooth, elastic, and passes the “windowpane test” – when a small piece can be stretched thin without tearing. This step develops the gluten network that traps gas and gives your bread its structure and rise. Kneading may take 10-30 minutes by hand or less with a mixer.
First Rise (Bulk Fermentation)
Cover the dough and let it rise for 45 minutes to 1 hour, or until doubled in size. This fermentation develops flavor and lightens the dough.
Shaping the Loaf
Turn the dough out onto a clean surface (no flour needed). Gently stretch it into an 18-inch square. Fold the left third over the center, then fold the right third over the left, like folding a letter. Starting from the short edge, roll the dough tightly into a log. Pinch the seams and tuck the ends under.
Use your hands to gently pull the loaf lengthwise on the work surface, creating surface tension and tightening the dough until it’s about 8 inches long with a taut surface. Check out a video on shaping here!
Final Proof
Place the loaf seam-side down in a greased and parchment-lined 9-inch loaf pan. For a soft crust and better oven spring, place a second loaf pan upside down on top to trap steam. Let the dough rise until it’s 2–3 inches above the pan rim-this can take 1 to 3 hours depending on room temperature.
Wash and Baking
Brush the loaf with cream or an egg wash for a glossy, golden crust. Bake at 350°F (175°C) for 35 minutes or until the internal temperature reaches 200°F (93°C).
Remove the bread from the pan immediately after baking to prevent sogginess. Cool completely on a wire rack before slicing to allow the crumb to set.
Tips for Success
- Vital Wheat Gluten: Especially helpful when using whole grains to improve dough strength and rise.
- Temperature Control: Keep ingredients at room temperature unless otherwise specified. Warm water should be around 100–110°F to activate yeast without killing it.
- Patience with Proofing: Don’t rush the final rise. Under-proofed dough will be dense; over-proofed dough may collapse.
- Surface Tension: Proper shaping and tension are crucial for a tall, even loaf.
- Storage: Store bread wrapped in a clean towel or bread bag at room temperature for up to 3 days or freeze slices for longer storage.
Why This Bread is Special
This sandwich bread recipe strikes a perfect balance between nutrition and texture. The freshly milled whole grains provide fiber, vitamins, and minerals, while the vital wheat gluten and enriching ingredients ensure a soft, tender crumb that’s easy to slice and perfect for sandwiches or toast. The subtle sweetness from honey and the rich flavor from khorasan make every bite a delight.
Baking bread from freshly milled grains is a rewarding experience that connects you to the very roots of food. This sandwich bread recipe offers a wholesome, delicious loaf that will elevate your meals and impress your family and friends. With patience and care, you’ll create bread that tastes like no other-rich in flavor, texture, and history.
Sandwich Bread with Freshly Milled Flour
Course: Breads, Yeast BreadsCuisine: AmericanDifficulty: Moderate1
Loaf30
minutes35
minutes105
kcal2
hours3
hours5
minutesThere’s something truly magical about baking bread from scratch, especially when you start with freshly milled whole grains. Today, I’m excited to share an in-depth recipe for a soft, tender, and flavorful sandwich bread made with a blend of hard white wheat and khorasan.
Ingredients
400g hard white wheat
40g kamut
15g vital wheat gluten (optional but improves the texture)
264g warm water
32g honey (or 12g sugar)
1 egg
5g white vinegar
60g (4Tbsp) soft butter
8g yeast
9g salt
Directions
- Mill the hard white wheat and kamut on the finest setting. Mix the vital wheat gluten in with the flour.
- In a separate bowl wisk together the water, honey or sugar, egg and vinegar.
- Pour the wet ingredients into the flour and mix until the flour is moistened and a wet dough forms.
- Cover and rest for 30 minutes to allow the flour to absorb the water.
- Add in your softened butter, yeast and salt. Mix until incorporated.
- Knead until you can form a window pane and the dough is smooth and elastic. Let rise for 45 minutes to an hour or until doubled.
- Turn out the dough onto a clean surface. There is no need to flour the surface. Stretch the dough into an 18 inch square. Fold the left third in and the right third over top. Starting from the short edge of the folded dough, roll like a jelly roll, making sure to roll tightly. Pinch the edges and tuck under the log. Using the surface of the table, pull the log, longways, toward you allowing the surface to create tension and lengthen the log until it is about 8″ and the surface is taut.
- Place into a 9″ greased and parchment lined loaf pan. Place a second loaf pan upside-down on top and let rise until 2-3 inches over the pan. This will take anywhere from 1-3 hours. Brush with cream or egg wash.
- Bake at 350 for 35 minutes or until the internal temperature reads 200. Immediately remove from the pan and parchment. Cool completely before slicing.
Notes
- Allowing enough time for the second rise is key to beautifully smooth surfaces on your loaves and an even crumb. I don’t see a lot of oven spring with these loaves so allow them to get as high as you want the finished loaf to be, which should be about 2 inches above the pan.
- If you prefer to leave out the Vital Wheat Gluten, I suggest substituting Durum for the Khorasan to increase the Wet Gluten Content.
Nutrition Facts
16 servings per container
Serving Size48
- Amount Per ServingCalories105
- % Daily Value *
- Total Fat
2g
3%
- Saturated Fat 1g 5%
- Cholesterol 13mg 5%
- Sodium 110mg 5%
- Total Carbohydrate
19g
7%
- Dietary Fiber 1.3g 5%
- Total Sugars 1.4g
- Protein 3.7g 8%
* The % Daily Value tells you how much a nutrient in a serving of food contributes to a daily diet. 2,000 calories a day is used for general nutrition advice.
Good morning,
I am a newby and am getting confused with weighted as volume recipes. Are the weights requested in the recipe before being milled or after?
Good question! A lot of people get confused when starting out. The weight will be the same for the grain as it is when milled. This is why it’s much more accurate then doing say, 1/4c grain to yield 1/2c milled flour, for example. Baking with the weight in grams significantly simplifies things as you can weigh out the wheat berries and know for sure that will be the amount of flour coming out of your mill!