
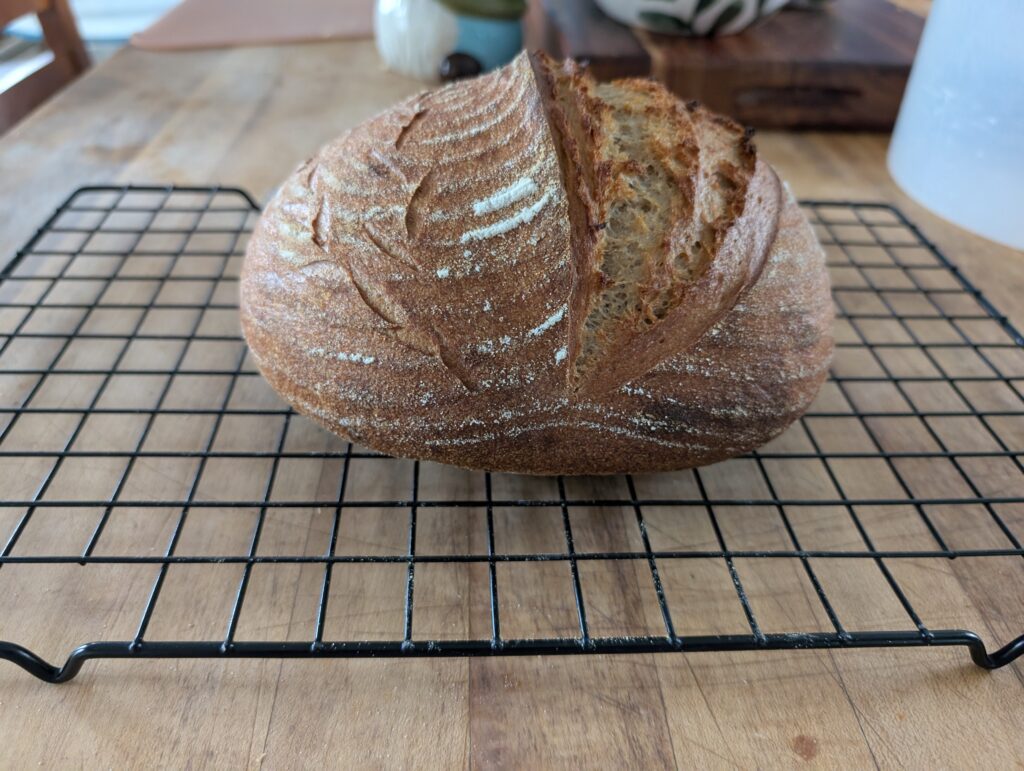
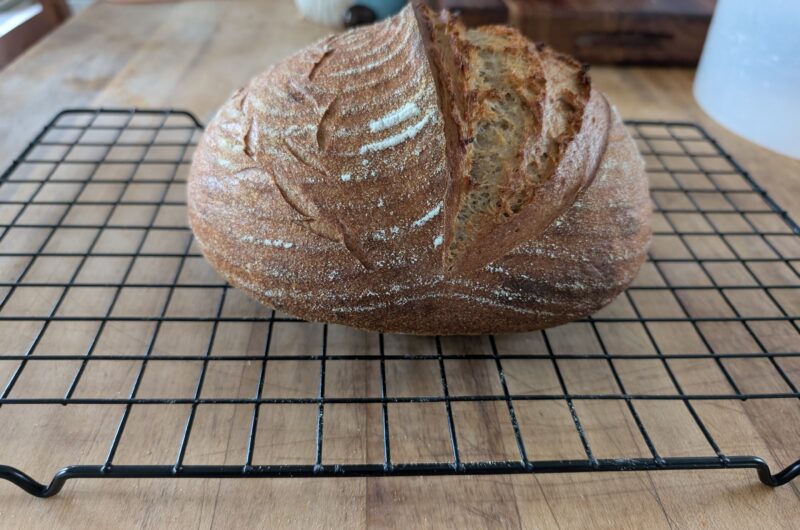
There’s something deeply satisfying about baking a sourdough rustic loaf from scratch, especially when it’s crafted with the wholesome goodness of freshly milled flour. This recipe combines the tangy complexity of sourdough with the nutty richness of ancient grains, resulting in a loaf with a crisp crust, airy crumb, and layers of flavor. Designed for bakers who value both tradition and efficiency, this guide walks you through a streamlined process. Mix the dough in the afternoon, let it ferment overnight, and bake the next morning (or up to 48 hours later!
Too many overcomplicated methods!
There’s a certain magic in the rhythm of sourdough baking, the quiet anticipation as dough rises, the earthy scent of freshly milled flour, the crackle of a golden crust as you slice into a loaf still warm from the oven. But if you’ve spent any time in the world of sourdough, especially with freshly milled flour, you’ve probably seen just how complicated people can make it. I know, because I’ve been there. I poured over endless charts, temperature guides, and conflicting advice, all in pursuit of that elusive, perfect rustic loaf.
When I first started baking with freshly milled flour, I was determined to find ways to make bread that tasted just as good as my bread with store bought flour. But every loaf seemed to present a new challenge. Sometimes the dough was too slack, other times too stiff. One batch would spring beautifully in the oven, while the next would spread flat and stubborn. I tweaked ratios, experimented with autolyse times, and even tried elaborate folding schedules that left me more frazzled than fulfilled.
How I developed my Freshly Milled Sourdough Rustic Loaf
What I learned, after many flour-dusted afternoons and more than a few “learning loaves,” is that sourdough, and especially baking with freshly milled flour, doesn’t have to be complicated. In fact, the more I simplified my process, the better my bread became. I realized that the heart of sourdough is patience, intuition, and a willingness to trust the process. You don’t need a degree in fermentation science or a kitchen full of gadgets. What you need is a method that fits into real life, delivers consistent results, and lets the honest flavors of freshly milled grain shine.
That’s how this Easy Rustic Sourdough Loaf was born. I found the right blend of grain, yielding a loaf with just the right balance of structure and flavor. I developed my hydration calculator to be able to calculate the correct hydration for the grains I was using. And simple methods like stretch-and-folds, became my go-to. Simple, hands-on, and forgiving. No ‘add water to the “right” texture,’ no ‘freshly milled is just dense’. Just a dough that is adjusted to specific grains water absorption and a schedule that fits into a busy day.
Necessary Adjustments
The cold proof in the fridge was another game-changer. In so many forums online, people insisted that freshly milled flour proofs too fast to cold ferment. This is not necessarily true! Freshly milled flour absolutely proofs fast because there is more “food” for the wild yeast to eat. To solve the over proofing problem, you have to adjust the amount of starter in the recipe, and stop bulk fermentation a bit early to account for the continued rise in the fridge. Instead of rushing to bake, I let the shaped loaf rest overnight (or even up to two days), developing a deep, tangy flavor and a crust that shatters under the knife. The result? Bread that’s rustic, nourishing, and full of character, without the stress.
The other vital adjustment is hydration. The only way to successfully use different grains, is correctly adjusting the hydration for each grain. I have seen so many recipes that state, “always add a quarter cup of flour.” or confusingly the opposite. “Always reduce the flour by a quarter cup when working with freshly milled flour.” This will only lead you to be confused, overwhelmed and unhappy with the results. Check out my Choosing your Grains or Converting Recipes pages to learn how to adjust the hydration for the specific grains you would like to use. Don’t just wing it! That will lead you to frustration and wasted grain!
In Conclusion
If you’ve ever felt overwhelmed by sourdough, or intimidated by the idea of freshly milled flour, let this recipe be your invitation to keep it simple. Embrace the process, and know that every loaf, perfect or not, is a step forward in your baking journey. This is the bread I come back to again and again: Easy, hearty, and full of nutrition. I hope it becomes a staple in your home, as it has mine!
Timeline for a Sourdough Rustic Loaf with Freshly Milled Flour
8:00 AM day before
1:00 PM day before
Mill your flour and autolyse the dough
Will the Hard White Wheat and Khorasan. Combine with the water and alllow it to autolyse for 30 minutes.
1:30 PM day before

Add the Starter and Salt.
Add in 90g of the starter and salt. Mix well.
Start of Bulk Fermentation
2:00-3:00 PM day before
Stretch and Fold
Do your first set of stretch and folds. Repeat every 30 minutes for a total of 3 stretch and folds. Allow the dough to proof for three to four hours.
6:00-7:00 PM day before
Finish Bulk Fermentation
Watch the dough not the clock. Bulk fermentation is done when the dough has visibly risen 50% and is jiggly and pulls away cleanly from the bowl. Refrigerate overnight.
3:00 PM or 2 hours before eating
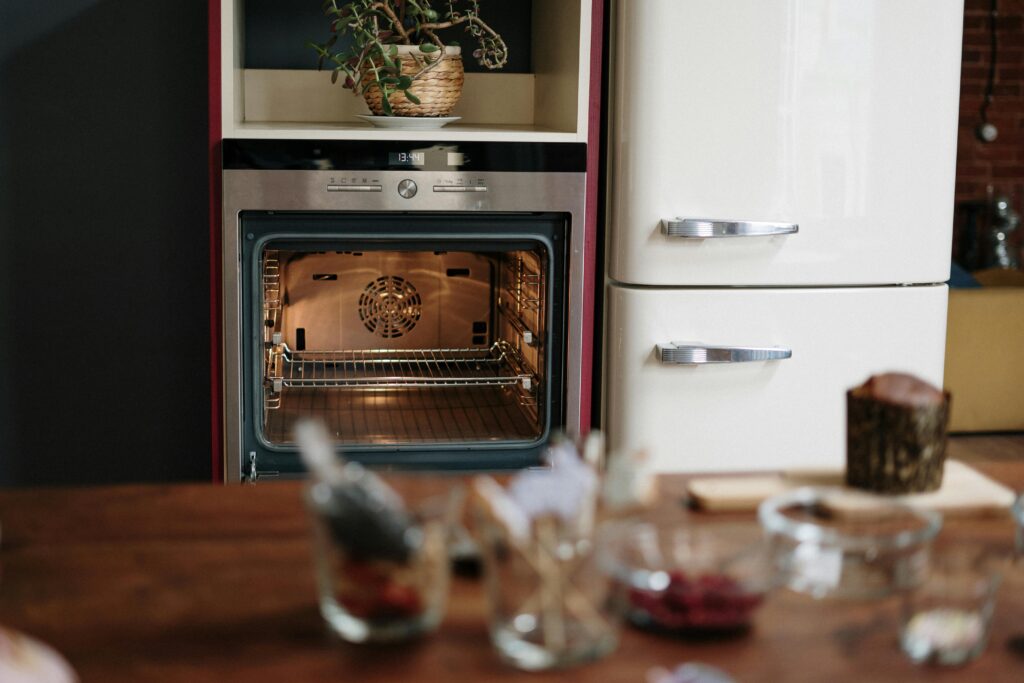
Preheat the Oven
Preheat the oven and dutch oven to 500 degrees for at least thirty minutes.
3:30 PM
Score and Bake
Score the cold dough and Bake according to the directions below.
5:00 PM

Slice and Enjoy!
Allow to cool for at least an hour before slicing.
Step by Step
Let’s break this recipe down step-by-step. Reference the timeline above to get a feel for when you need to start each step but feel free to adapt it to your schedule.
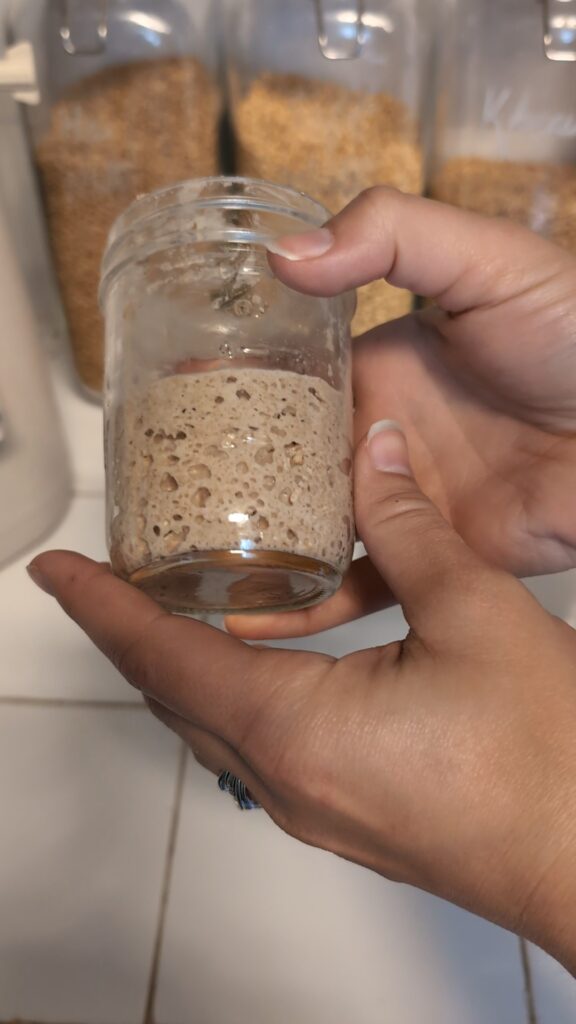
Feed Your Starter
Discard all but 38g of your existing starter. Save the discard for crackers or pancakes (never pour it down the sink as it can clog pipes!).
Combine 38g starter, 38g flour, and 38g water in a jar. I use hard red in my starter to give it more strength. Check out this article if you have questions about sourdough starter and freshly milled flour. Mix until smooth, cover loosely, and let rise in a warm spot (75–80°F) until doubled (4–6 hours).
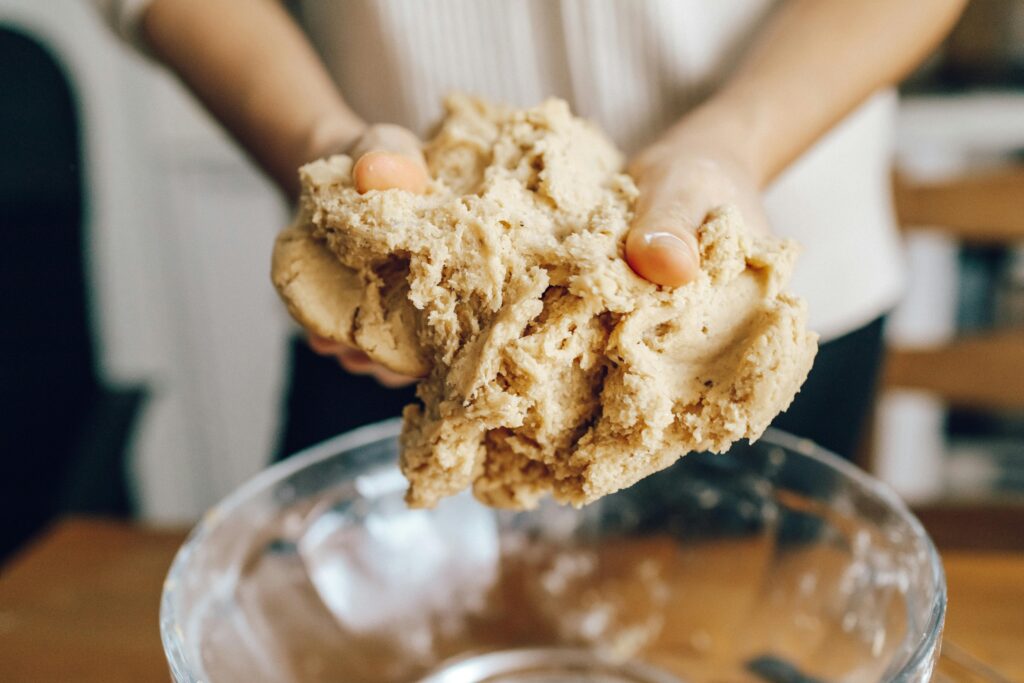
Mix the Dough
Mill the Flour: Weigh out 360g Hard White Wheat and 90g Khorasan. Mill the grain on your mills finest setting.
Autolyse: In a large bowl, combine 350g warm water and the freshly milled flour. Mix until no dry flour remains. Cover and rest for 30 minutes. This hydrates the flour and jumpstarts gluten development.
Add Salt and Starter: Sprinkle 12g salt and 90g active starter over the dough. Use wet hands to mix thoroughly for 3–5 minutes, ensuring no streaks remain. Bulk Fermentation begins when the starter is added to the dough
Feed the leftover starter: You will be left with 20g of starter in your jar. This we will replenish with equal parts flour and water.
Bulk Fermentation & Stretch and Folds
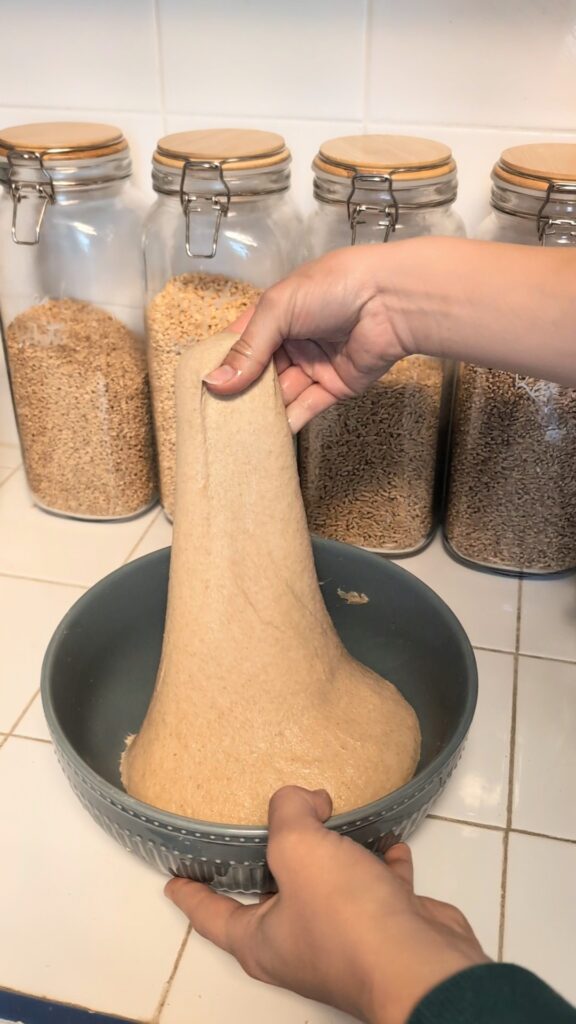
First Stretch and Fold: After 30 minutes, wet your hands and gently stretch the dough upward, then fold it over itself. Rotate the bowl and repeat 3 more times. Cover and rest.
Repeat: Perform 2 more sets of stretch and folds at 30-minute intervals (3 sets total). After three sets, check for a window pane. If you cannot form a window pane, wait 30 more minutes and do another set of stretch and folds. Deduct this time from the buk rise to avoid over fermenting!
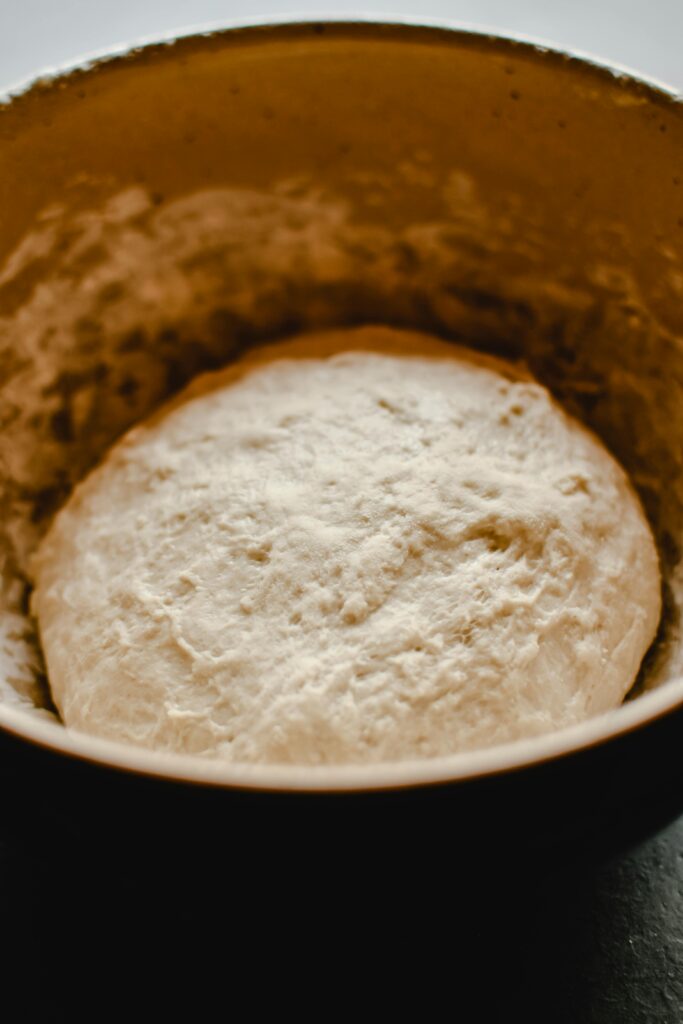
Bulk Rise: Cover the dough and let it rest at room temperature for 3–4 hours. It should rise by about 50% (look for small bubbles and a slightly domed surface). I prefer to mix my dough in a straight sided container instead of a bowl. This allows me to clearly mark the level at which the dough starts and track what percentage it has risen. By doing this, we take away any guessing and prevent over or under proofing.
Shaping a Sourdough Rustic Loaf
Shape the Loaf: Turn the dough onto a clean, unfloured surface. Shape into a boule or batard. See below.
Boule: The boule is a classic round loaf and one of the simplest shapes to master. The envelope technique is especially easy for beginners:
- Gently turn your dough onto a lightly floured surface.
- Stretch one side of the dough outward and fold it toward the center.
- Repeat with the opposite side, then with the top and bottom, folding each toward the center like closing an envelope.
- Flip the dough over so the seam is on the bottom.
- Cup your hands around the dough and gently rotate it, tucking the edges underneath to create surface tension and a smooth, round shape.
- Place the dough seam-side up into the banneton.
Batard: The batard is an oval-shaped loaf that’s just as approachable:
- Gently flatten the dough into a rectangle.
- Fold one third of the dough over the center, then fold the other third over the top (like folding a letter).
- Roll the dough into a log, pinching the seam closed.
- Place the dough seam-side up into the banneton.
Cold Fermentation
Refrigerate: Place the shaped dough seam-side up in the banneton. Cover with a towel and refrigerate for 24–48 hours.
This timing is very flexile. We are essentially stalling the wild yeast from being active, allowing the dough to ferment without over proofing. If you prefer a mild sourdough, lean toward a shorter cold ferment. For a stronger sour flavor, aim for the longer end of the fermentation timing. If you are going to aim for a 48 (or more) hour fermentation. Consider only allowing the dough to bulk ferment to about 50% as it will rise some in the fridge.
Bake
Preheat: Place a Dutch oven in your oven and preheat to 500°F (260°C) for at least 30 minutes.
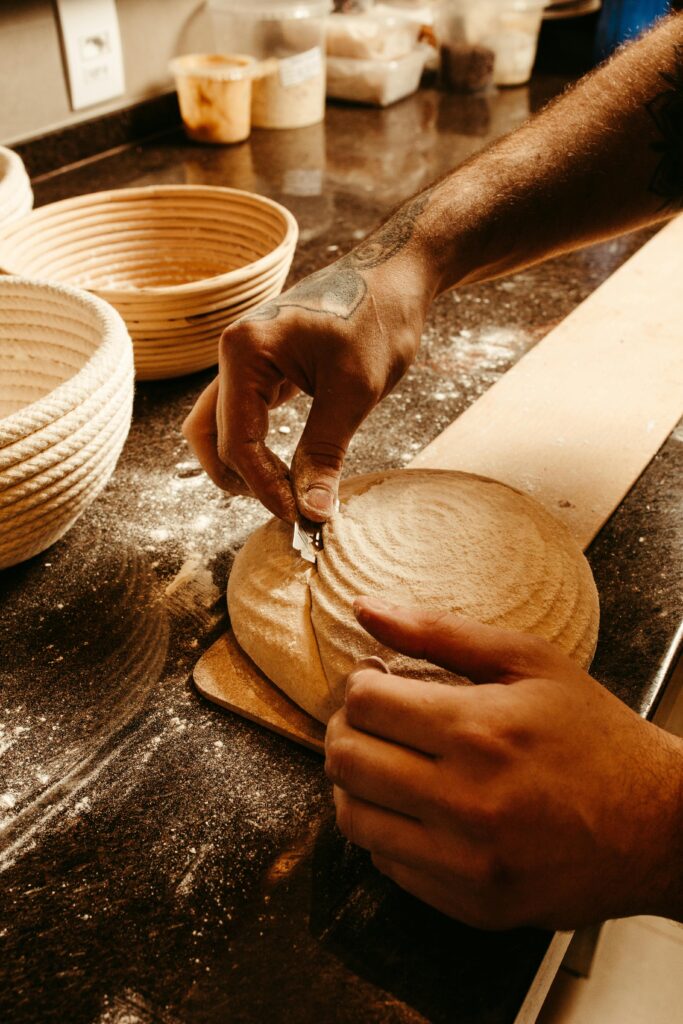
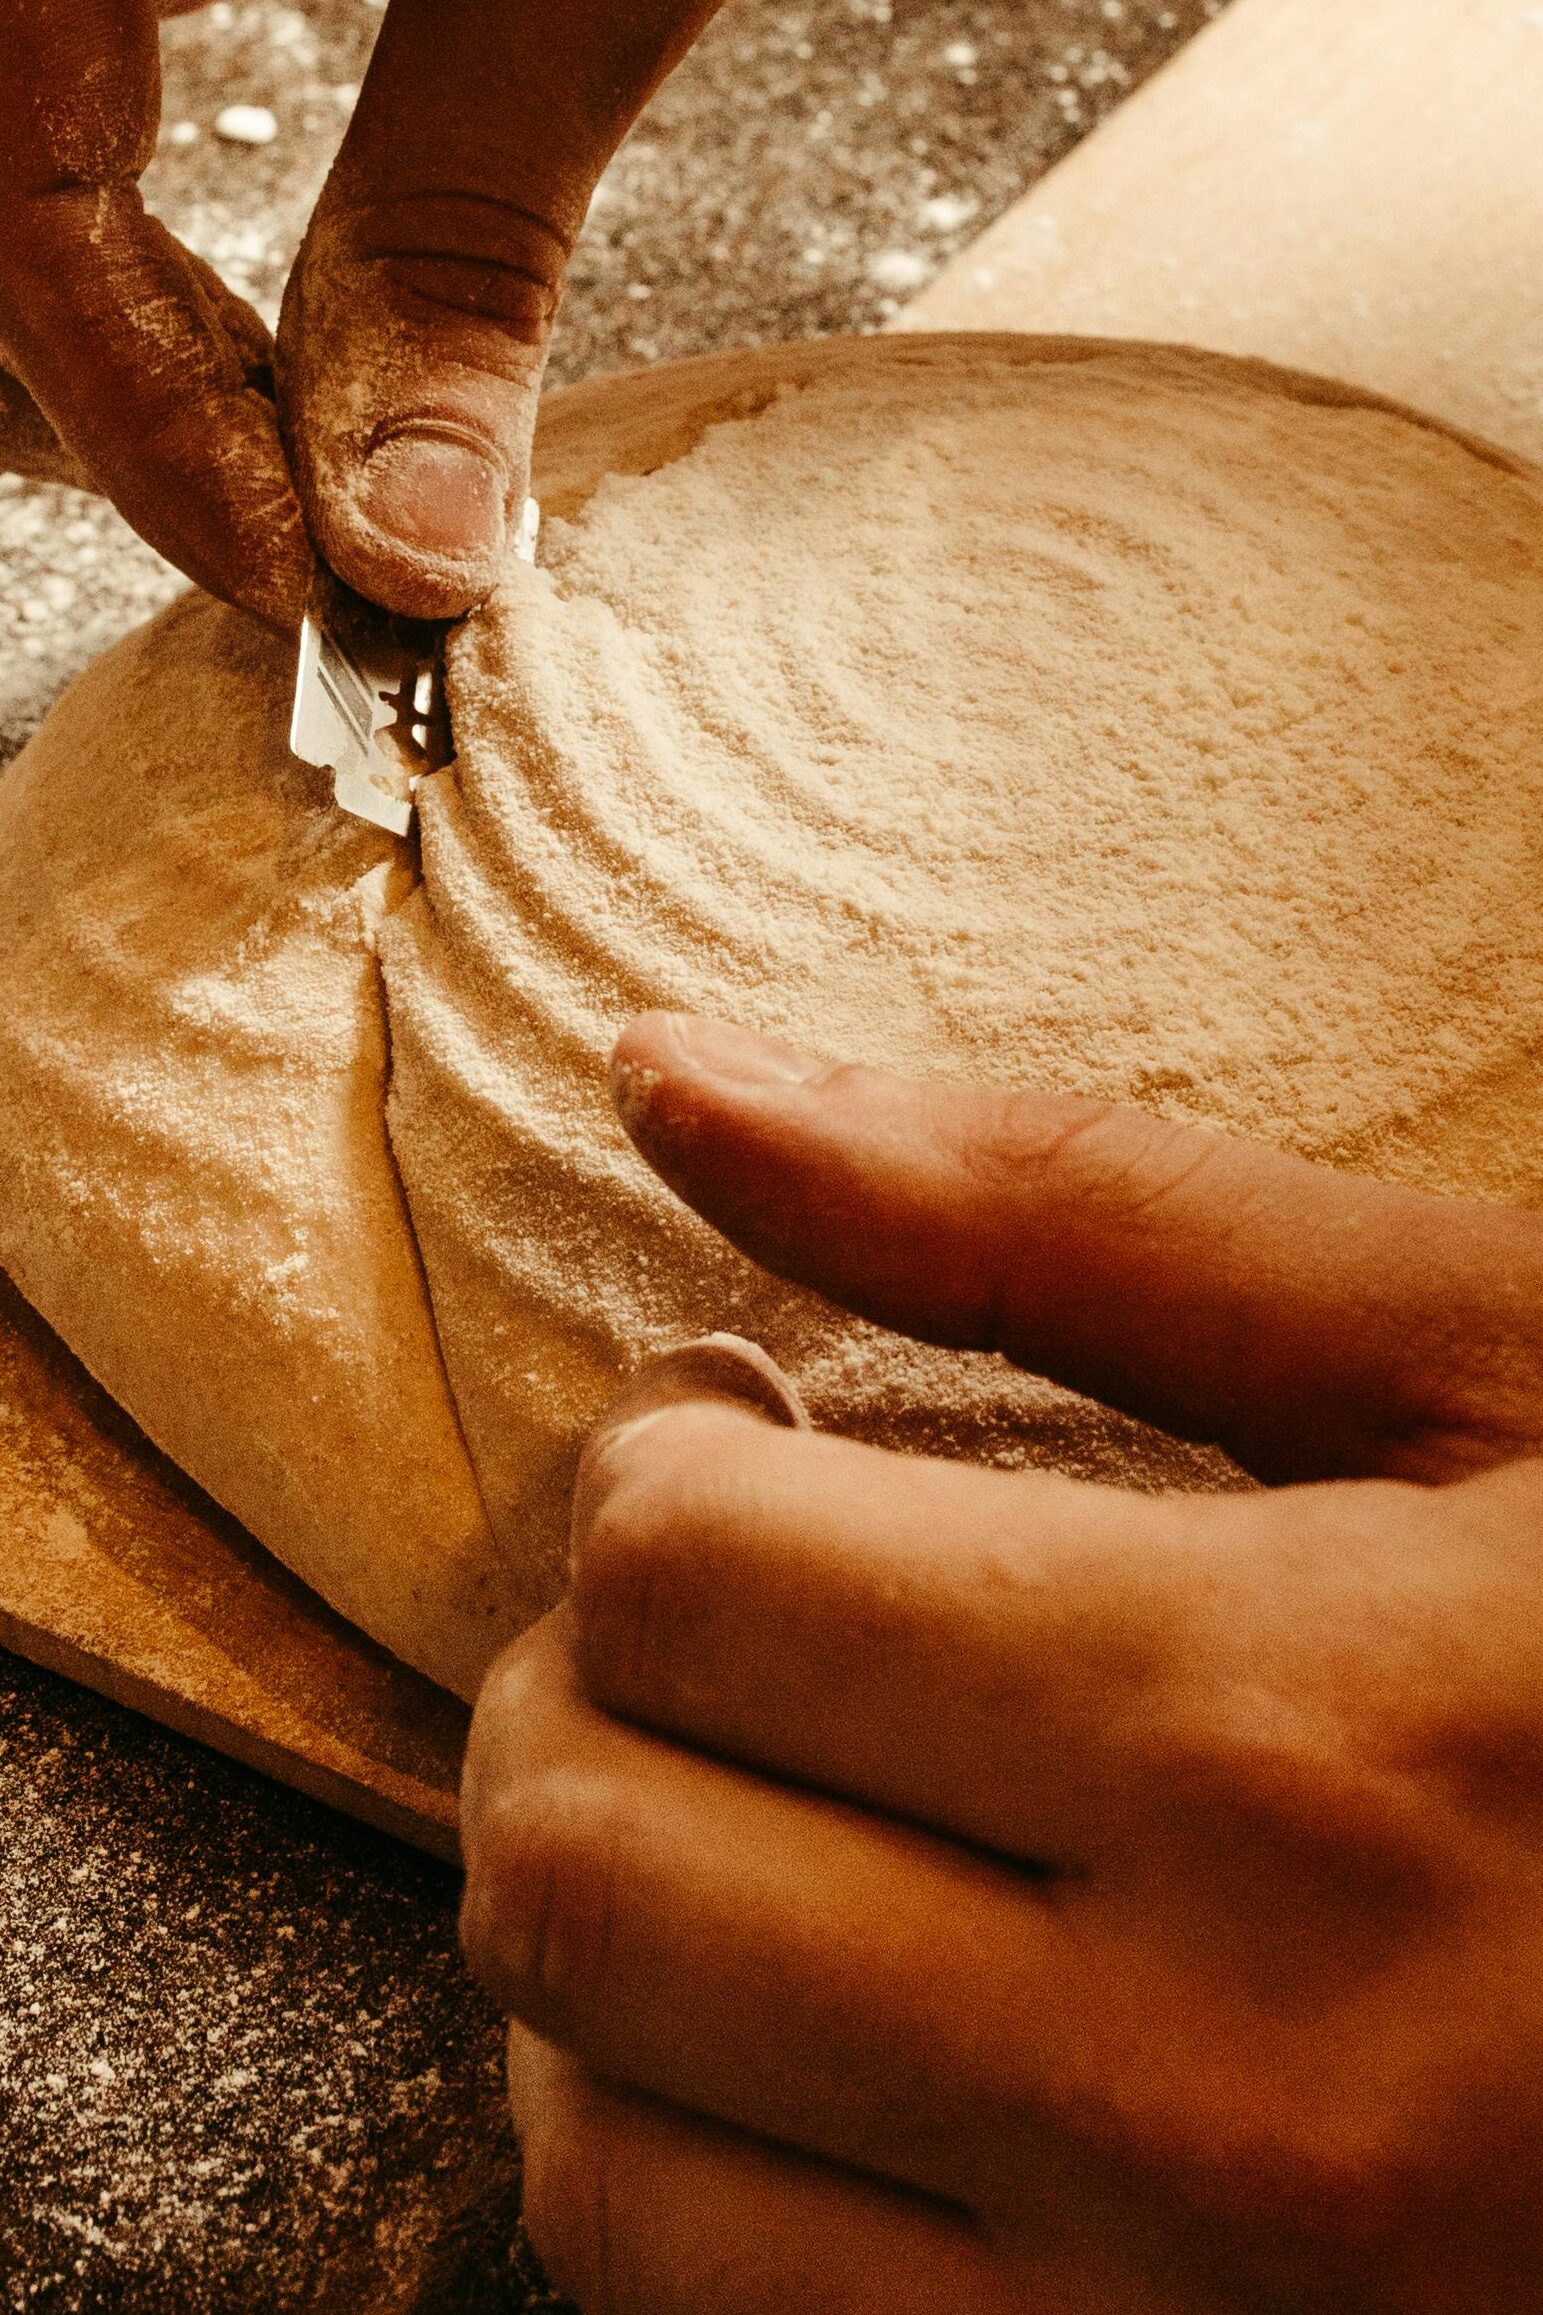
Score the Dough: Remove the dough from the fridge. Place it on a parchment paper sling and score the top with a lame or sharp knife at a 45° angle.
Bake with Steam: Carefully transfer the dough (with the parchment) into the hot Dutch oven. Add 5–6 ice cubes around the edges, then cover with the lid. Bake at 500°F for 18 minutes.
Finish Baking: Remove the lid, reduce the temperature to 450°F (232°C), and bake for 20–25 minutes until the crust is deep golden and the internal temperature reaches 200°F (93°C).
Cool: Let the loaf cool on a wire rack for at least 1 hour before slicing.
Alternatively Open Bake: To open bake, first ensure you do not have a gas oven. Gas ovens vent the steam too efficiently making it extremely difficult to open bake. Preheat your baking stone or steel with a metal pan underneath to 500. Make sure you use metal as glass will shatter when the water is poured in. Place the loaf onto the steel and pour water into the hot metal pan to create steam. Bake for 18 minutes, vent the steam and reduce the temperature to 425. Bake for 15-20 more minutes or until the internal temperature reaches 200 degrees.
Enjoy!
Happy baking and as always, please do not hesitate to reach out if you have any questions! I am always happy to help! You can also follow me on Instagram and Facebook to be updated as new recipes hit the blog! I hope you enjoy my Easy Sourdough Rustic Loaf with Freshly Milled Flour.
Easy Sourdough Rustic Loaf with Freshly Milled Flour
Course: Breads, Sourdough BreadCuisine: FrenchDifficulty: Intermediate1
loaf1
hour40
minutes76
kcal24
minutes1
hour41
minutesThere’s something deeply satisfying about baking a sourdough rustic loaf from scratch, especially when it’s crafted with the wholesome goodness of freshly milled flour. This recipe combines the tangy complexity of sourdough with the nutty richness of ancient grains, resulting in a loaf with a crisp crust, airy crumb, and layers of flavor.
Ingredients
- Starter
38g starter
38g flour
38g water
- Dough
350g warm water
360g Hard White Wheat
90g Khorasan
12g Salt
90g Active Starter (from the above feeding)
Directions
- Feed the Starter: Morning of the day before
- Discard all but 38 grams of your starter needed in this recipe. You can save it in the fridge to use in discard recipes or dispose of it in the trash NOT down the sink!
- Combine the starter, flour and water. Mix well and leave loosely covered in a warm spot for 4-6 hours or until doubled.
- Replenish your remaining 20g of starter with equal parts water and flour.
- Mix the Dough: Afternoon the day before
- Combine the water and flour. Mix until a shaggy dough forms.
- Autolyse for 30 minutes to allow the flour to fully absorb the liquid.
- Add in the salt and starter. Combine thoroughly for 3-5 minutes to ensure even distribution. Bulk Fermentation begins as soon as you add the starter.
- Cover and rest the dough for 30 minutes before doing your first Stretch and Folds.
- Rest for 30 more minutes and perform another set of Stretch and Folds. Repeat once more for a total of three sets.
- Cover and rest for three and half to four hours. The dough should rise about 50%.
- Turn the dough out onto a clean surface. I do not flour the table. Shape using the Boule or Batard method.
- Place the shaped loaf, seam-side up in a banneton floured with rice flour. (Alternatively, use a bowl not much bigger then your shaped loaf. Line it with a tea towel and flour it heavily with rice flour. )
- Cover the dough with a towel and refrigerate 24 to 48 hours.
- Bake: Next day
- Preheat the oven to 500 with the Dutch oven inside. Cut a piece of parchment paper to about 8″ wide and as long as the parchment roll is. Turn the dough out of the banneton onto the middle of the parchment sling.
- Score the dough using a lame, razor blade or a sharp knife. Score it at a 45 degree angle and slash quickly and about ½ inch deep.
- Lift the dough using the parchment sling, into the preheated Dutch Oven. Toss about five ice cubes into the bottom of the Dutch Oven and put the lid on quickly to hold in the steam.
- Place into the oven and bake for 18 minutes.
- Remove the cover and reduce the temperature to 450 degrees and bake for 20-25 more minutes. The bread should read 200 degrees with a probe thermometer.
Notes
- Open Bake: To open bake, first ensure you do not have a gas oven. Gas ovens vent the steam too efficiently making it extremely difficult to open bake. To open bake, Preheat your baking stone or steel with a metal pan underneath to 500. Place the loaf onto the steel and pour water into the hot metal pan to create steam. Bake for 18 minutes, vent the steam and reduce the temperature to 425. Bake for 15-20 more minutes.
Nutrition Facts
22 servings per container
Serving Size35
- Amount Per ServingCalories76
- % Daily Value *
- Total Fat
0.37g
1%
- Sodium 240mg 11%
- Total Carbohydrate
15.3g
6%
- Dietary Fiber 2.37g 9%
- Protein 3g 6%
* The % Daily Value tells you how much a nutrient in a serving of food contributes to a daily diet. 2,000 calories a day is used for general nutrition advice.
Thank you for this resource! I was wondering, if I don’t want to use Khorasan flour, am I able to substitute it with 90 more grams of the hard white flour. I’m just starting to gain interest in milling my own flour and I want to start off buying just one grain before deciding if it’s a long-term hobby for me.
Absolutely! The khorasan amount is minimal enough that you shouldn’t need to adjust the hydration but the gluten content will be slightly lower so you can always add 5-10g vital wheat gluten if you find it’s too dense. You can read more about the different grains here if you are interested in the science behind it. https://graintotables.com/choosing-your-grains/ Keeping it simple if you are just starting out though, hard white is probably my favorite and most used grain!